


- Non-Structural Column Wraps
- Structural Fiberglass Columns
- Cellular PVC
- Decorative Millwork
- T&G | Shiplap Planks
- Premier Shutters
- Outdoor Living
- Ceiling Beams
- Flexible Mouldings
- Interior Ceilings & Walls
- Wainscoting
- Clearance Items
Joining Round Wood Columns
 Sometimes while doing a renovation, you run into support posts. There are a variety of ways to decorate these posts, but the easiest is to install a round column around it. It's easy and here's how you do it.
Note: Split columns are NOT load-bearing.
Ensure that the inside column diameter is greater than the diameter of the support post it will be installed around.
- Measure the overall height of the opening where you will be installing the column.
- Measure the height of the base and the cap and subtract the total from the overall height of the column. This is done because the column will sit on top of the base and the cap will sit on top of the column.
- Using a hand saw, cut excess material from the bottoms of the halves of the column. You never want to cut the tapered end of the column (normally the top).
- Fit the two halves including the cap and base for size (height-wise) remember to include the base and cap when fitting. Ensure that everything fits flush.
- Join Base halves together with adhesive and screw secure to the floor. Make sure the base is level before securing; and that the base is centred on the support post.
Note: You can use shims to level the Base and Cap if needed. - Screw the Cap to the ceiling after applying a bead of adhesive to both connecting halves. Make sure the Cap is level before securing; and that the cap is centred on the support post.
- Ensure the adjoining surfaces of the column are clean and dry. Apply a bead of Carpenters Glue or PL Premium Adhesive to the connecting surfaces on both halves.
- Align the column halves around the support and join them together.
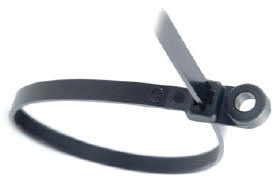
- Secure the two halves using Electric Cable Ties, place ties approximately 18" apart and pull tight. Larger columns may require multiple ties. Make sure the column is square using a level before toenailing the column in place. Once the two halves have adhered to each other, you can toenail or screw around the bottom of the two halves of the column to the Base, this will secure the column to the base. Once again check the column with a level to ensure it is installed straight.
- Allow the Adhesive to completely cure before cutting away the Cable Ties. Use a putty knife to remove any excess adhesive.
- Use Spackling (plaster compound) to fill the seam between the two halves, the spackling can also be used to fill the holes left by the screw or nail heads. Spackling should also be used to fill nail or screw holes. Once the spackling dries, use sandpaper to sand the seams smooth.
- Dap should be applied around the seam where the column touches the base and cap. Dap is a paint-able caulking that is readily available at any hardware store. Clean excess Dap with a damp rag or your finger.
- The column is now ready to prime and paint. Semi-gloss paint is recommended because it is easy to clean; the thickness of the paint will also help to hide any imperfections left by the installation process.
Joining split Fiberglass or Wood Columns
Joining a Split column as a Pilaster