
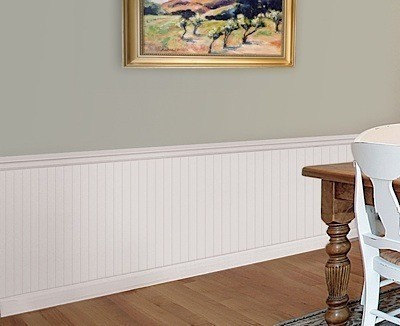


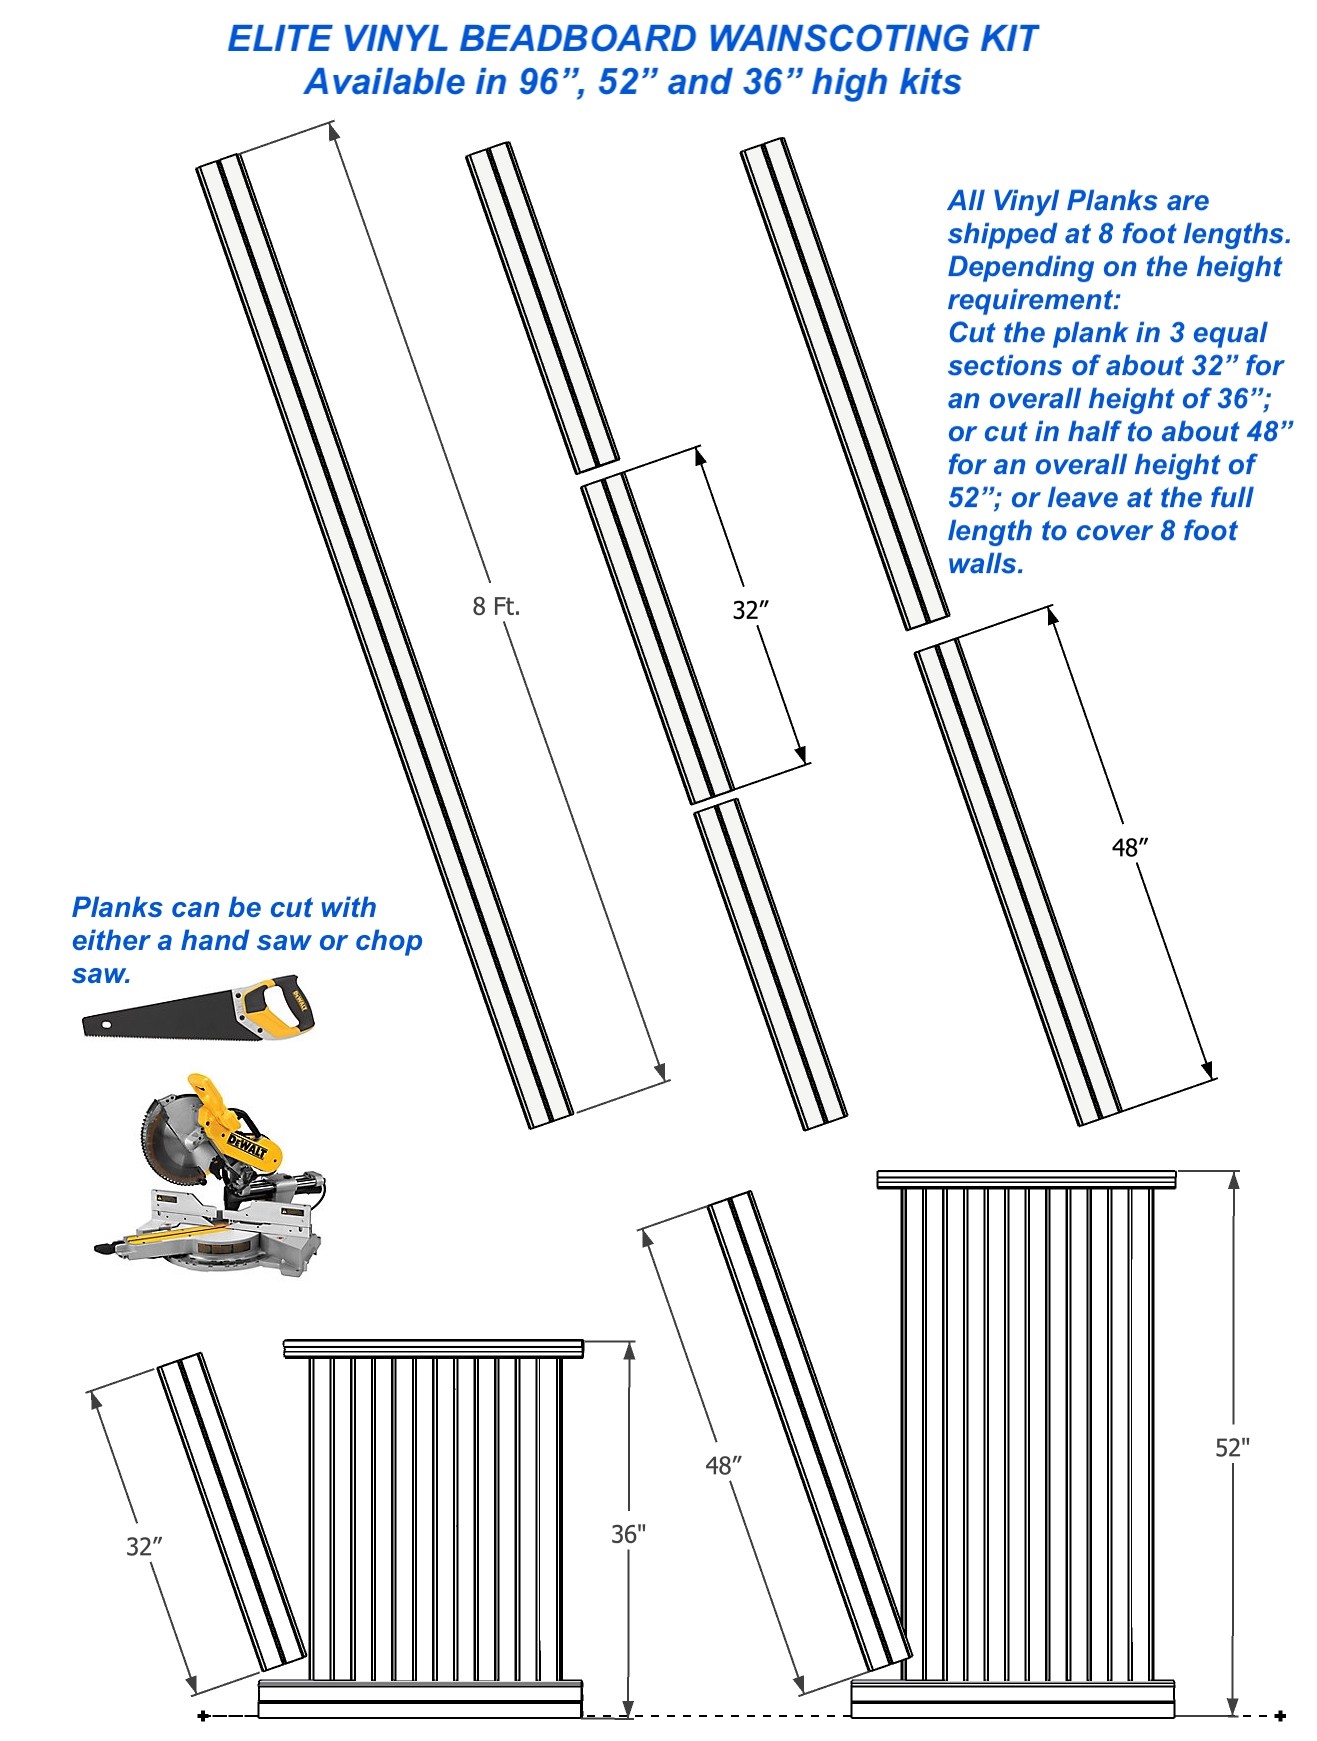


PVC Beadboard Kit, 36" H, 8 ft
Interior PVC Beadboard Kit 8 feet long in pre-finished white vinyl 36" high to cover 8 running feet of wall*. No painting required but can be painted. This kit contains all the trims needed. Eight Planks (8 ft long) may have to be cut down to 3 sections of about 32" on site. The cap and baseboard add 4" the the height of the planks.
Currently out of stock.
-
Vinyl Wainscoting How To
Detailed installation instructions
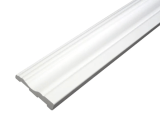
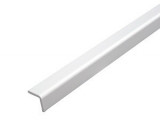
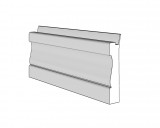
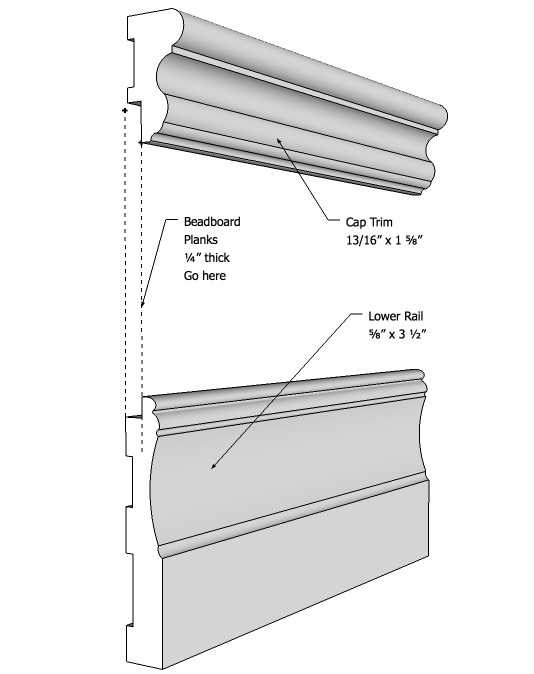
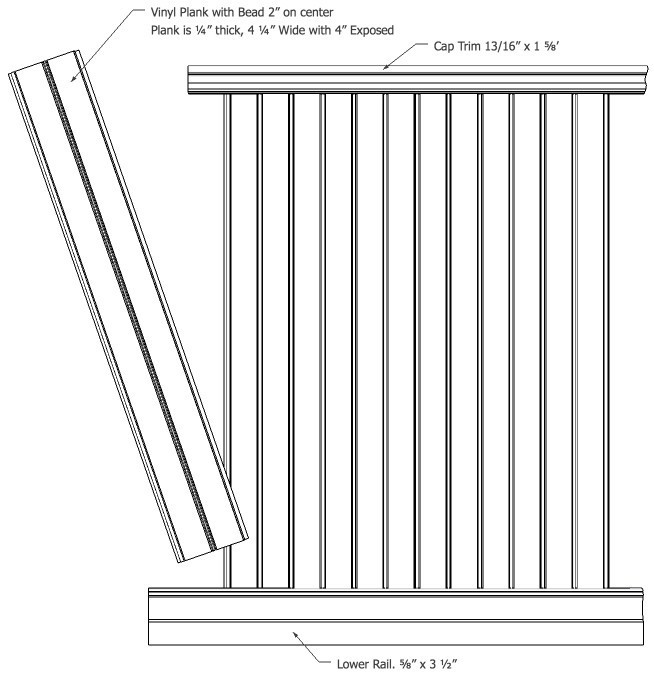
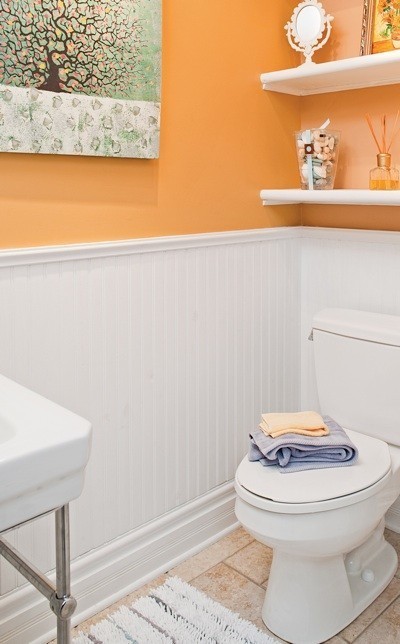
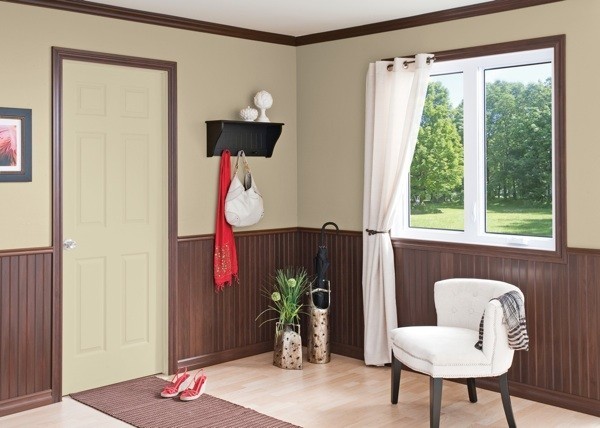
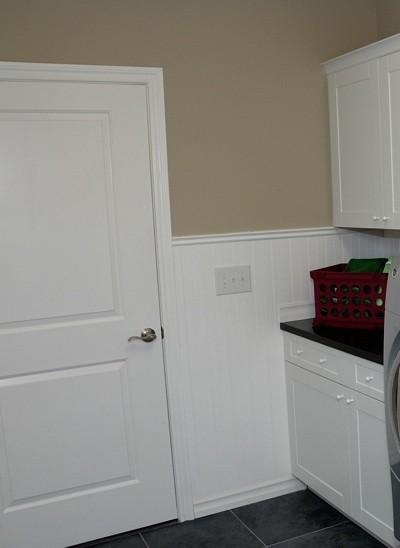
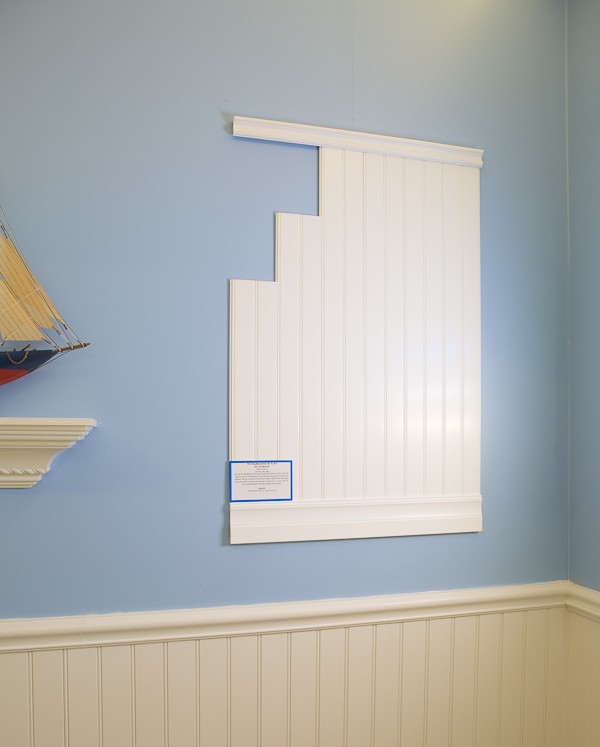
Interior PVC Beadboard Kit 8 feet long in pre-finished low maintenance vinyl white 36" high to cover 8 running feet of wall. No painting is required but can be painted. This kit contains all the trims needed. Eight PVC Planks 8 ft. long*, to be cut down to 3 sections of about 32" on site. The PVC planks are ¼” thick and 4 ¼” wide, of which approximately 4” is exposed. The beads are 2” on the center. The cap and baseboard add 4" to the height of the planks. The wainscoting cap is 1-5/8" x 95 " and made of ¾” thick material. The base moulding is 3-1/2" x 95" and is made of 5/8” thick material.
*Actual length is 95”, which is the maximum length allowed for parcel shipping.
-
Production TimeQuick Ship
-
Tarrif Code3925.90.0000
-
Shipping CostFree Shipping Special on orders over $500. For orders under $500, $20 per kit.
Limitations to our Shipping Specials
INSTALLATION INSTRUCTIONS FOR VINYL WAINSCOTING
“Perfect Finish” Ready-to-Install PVC/Cellular Composite Wainscot * NO PAINTING REQUIRED!

Its made from high strength PVC materials. This material works like wood: cuts, glues or nails. However it will not splinter or crack and has no knots. This product has a lifetime warranty on rot. The product is for interior use only.
Tools: Mitre Saw or Hand Saw, Hammer, Level, Square, Caulking Gun, Tape Measure, Pencil
[image 1 ]
Additional Materials
Panel Adhesive (PL Premium or No More Nails Tub Surround), 1’’ finishing nails or brad nails (Optional)Installation Tips
Use a quality panel adhesive and follow manufacture’s instructions. When tapping panels into each otheruse a wood block or end cut of one of the panels. Do NOT use the hammer directly on the panel or butt panels too tighly. Allow for normal expansion and contraction (1/32").
For better holding strength angle all nails and drive nails leaving 1/8” above surface and finish using a nailset. When possible nail into moulding groove. This avoids surface damages. For cleaner cut, saw into the finished surface.
When you approach an outlet, turn off the power. Take careful measurements of the outlet location and cut out the opening.
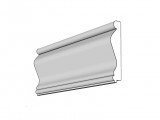
Installation: Base Trim
Measure your wall, if your wall is longer than 8’ pre-mitre the joining end with the next piece of base board you will be using.
[image 7 ]
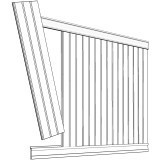
Make certain the Base Trim has the pre-grooved end up before glueing or nailing. Apply glue in a zig-zag pattern on back of Base Trim and apply to wall. Make sure Base Trim pieces align on the wall
[image 2 & 3 ]
Installation: Panel
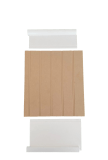
The correct installation of the first panel board is the key to an easy and successful installation.
Begin at the left most corner of your installation (opposite if you are left-handed). Each panel is tongue and grooved for a uniform fit and easy installation. Determine which side you want to enhance your room beaded or smooth. Keep the groove edge towards the starting corner. Using a level make sure the first panel is absolutly square. When necessary, scribe and remove material from the panel from the groove
side (inside corner).
[image 4 ]
Next, determine the height you want for your wainscot and cut only if necessary.
[image 5 ]
Do not force fit pieces together. Apply glue on back side of panel place into groove on Base Trim and position into corner.
[image 6 ]
(Optional) Nailing the top, middle and bottom tongue every 16” will ensure better adhesion.Carefully measure and fit next panels. The last panel may also need to be trimmed to fit into the corner.
Installation: Chair Rail
Make sure that all panels are correctly installed.Measure your wall, if your wall is longer than 8’ pre-mitre the joining end with the next piece of Chair Rail you will be using.
[image 7 ] Make certain the Chair Rail has the pre-grooved end down before glueing or nailing.
Apply glue in a zig-zag pattern on back of Chair Rail and apply to wall. Make sure Chair Rail pieces align on the wall.
[image 2 & 3 ]
Maintenance
Cleaning your Vinyl Millwork with a damp cloth makes it look like new.